
Lower Yosemite Falls Hiking Trail
When visiting Yosemite Valley, you’ll immediately take notice of its collective grandeur. Everywhere you look, it’s one amazing sight after...
Disclosure: This post contains affiliate links. If you make a purchase through these links, I may earn a small commission at no additional cost to you. I only recommend products or services that I believe will add value to my readers.
When visiting Yosemite Valley, you’ll immediately take notice of its collective grandeur. Everywhere you look, it’s one amazing sight after another. One of those sights which stand out amongst most is the park’s namesake - Yosemite Falls, the tallest waterfall in North America at 2,425 feet.
When searching for the best things to do in Yosemite Valley, many will point to the Upper Yosemite Falls hike and for good reason. The views from up there are simply incredible. However, it’s a physically demanding, time consuming hike.
For those who don’t have the time (or energy) to tackle the upper falls, and simply want an up-close view of this magnificent waterfall, there’s the Lower Yosemite Falls hiking trail. It’s an excellent option for those just looking to hit up the highlights.
So where do you park to see Yosemite Falls? How long is the trail to the lower portion? Is this trail stroller friendly? I answer all of these questions and more in the post below.
Trail Stats
Location: Yosemite Valley, California
Fee: Standard park entry fee (currently $35)
Open: All year
Cell Service: Decent, but can be spotty
Restroom: Semi-large structure with flush toilets at the trailhead
Parking: Large day-use lot east of Yosemite Valley Lodge
EV Stations: Rivian Waypoint stations in the Yosemite Valley Lodge lot
Difficulty: Easy
Popularity: Mega high
Mileage: One mile for the whole loop
Time: Less than one hour
Elevation Gain: 55 feet
Condition: Well maintained
Features: Lower portion of Yosemite Falls
Best Viewed: November - June (peak flow in May)
Pets: Allowed, but must be leashed
Drones: Prohibited
Hazards: Wildlife encounters are possible, as well as slippery rocks around the waterfall (off trail)
My Visit(s): 2015, 2020, 2021 and 2024
Lower Yosemite Falls Parking

Much like the rest of Yosemite Valley, finding parking for Yosemite Falls can be quite the hassle. It’s for this reason I always encourage people to utilize the free Yosemite Valley Shuttle. It makes multiple stops at most of the valley highlights and is easy to use.
However, if you insist on using your own vehicle to get around, you’ll find parking for Yosemite Falls (either the upper or lower trails) in the lot east of Yosemite Valley Lodge, just a bit further down Northside Drive.
To get to the trailhead from here, you can, in theory, walk along Northside Drive but I don’t recommend it. The best (and safest) ways to reach it are to either cross the street and take the trail that cuts through Camp 4 or take the trail through Yosemite Valley Lodge and then cross the street to the trailhead.
Either way, you’re looking at a (roughly) half a mile walk to the trailhead, one way. I’d be remiss if I didn’t mention the parking lot directly across the street. I’m not encouraging you to park there as that area is typically reserved for hotel guests, but it is there. So do with that what you will.
Again, I’m going to strongly encourage you to utilize the shuttle. Park your vehicle at either Curry Village or Yosemite Village and hop on. Be sure you’re taking the valley-wide shuttle and not the east valley one. Shuttle service begins at 7am and ends at 10pm and again, it is free. The stop you’ll use for Yosemite Falls is #6.
Lower Yosemite Falls Trail

Both the trail to the base of the falls, and the conjoining loop, are paved paths with virtually no elevation gain to speak of. They’re also wheelchair and stroller accessible, making it an ideal outing for the entire family.
To the right of the trailhead is a semi-large structure with flushable toilets, water bootle refill stations and an array of unshaded picnic tables. It’s busy here quite often so if you’re looking to enjoy a quiet picnic, this isn’t it.
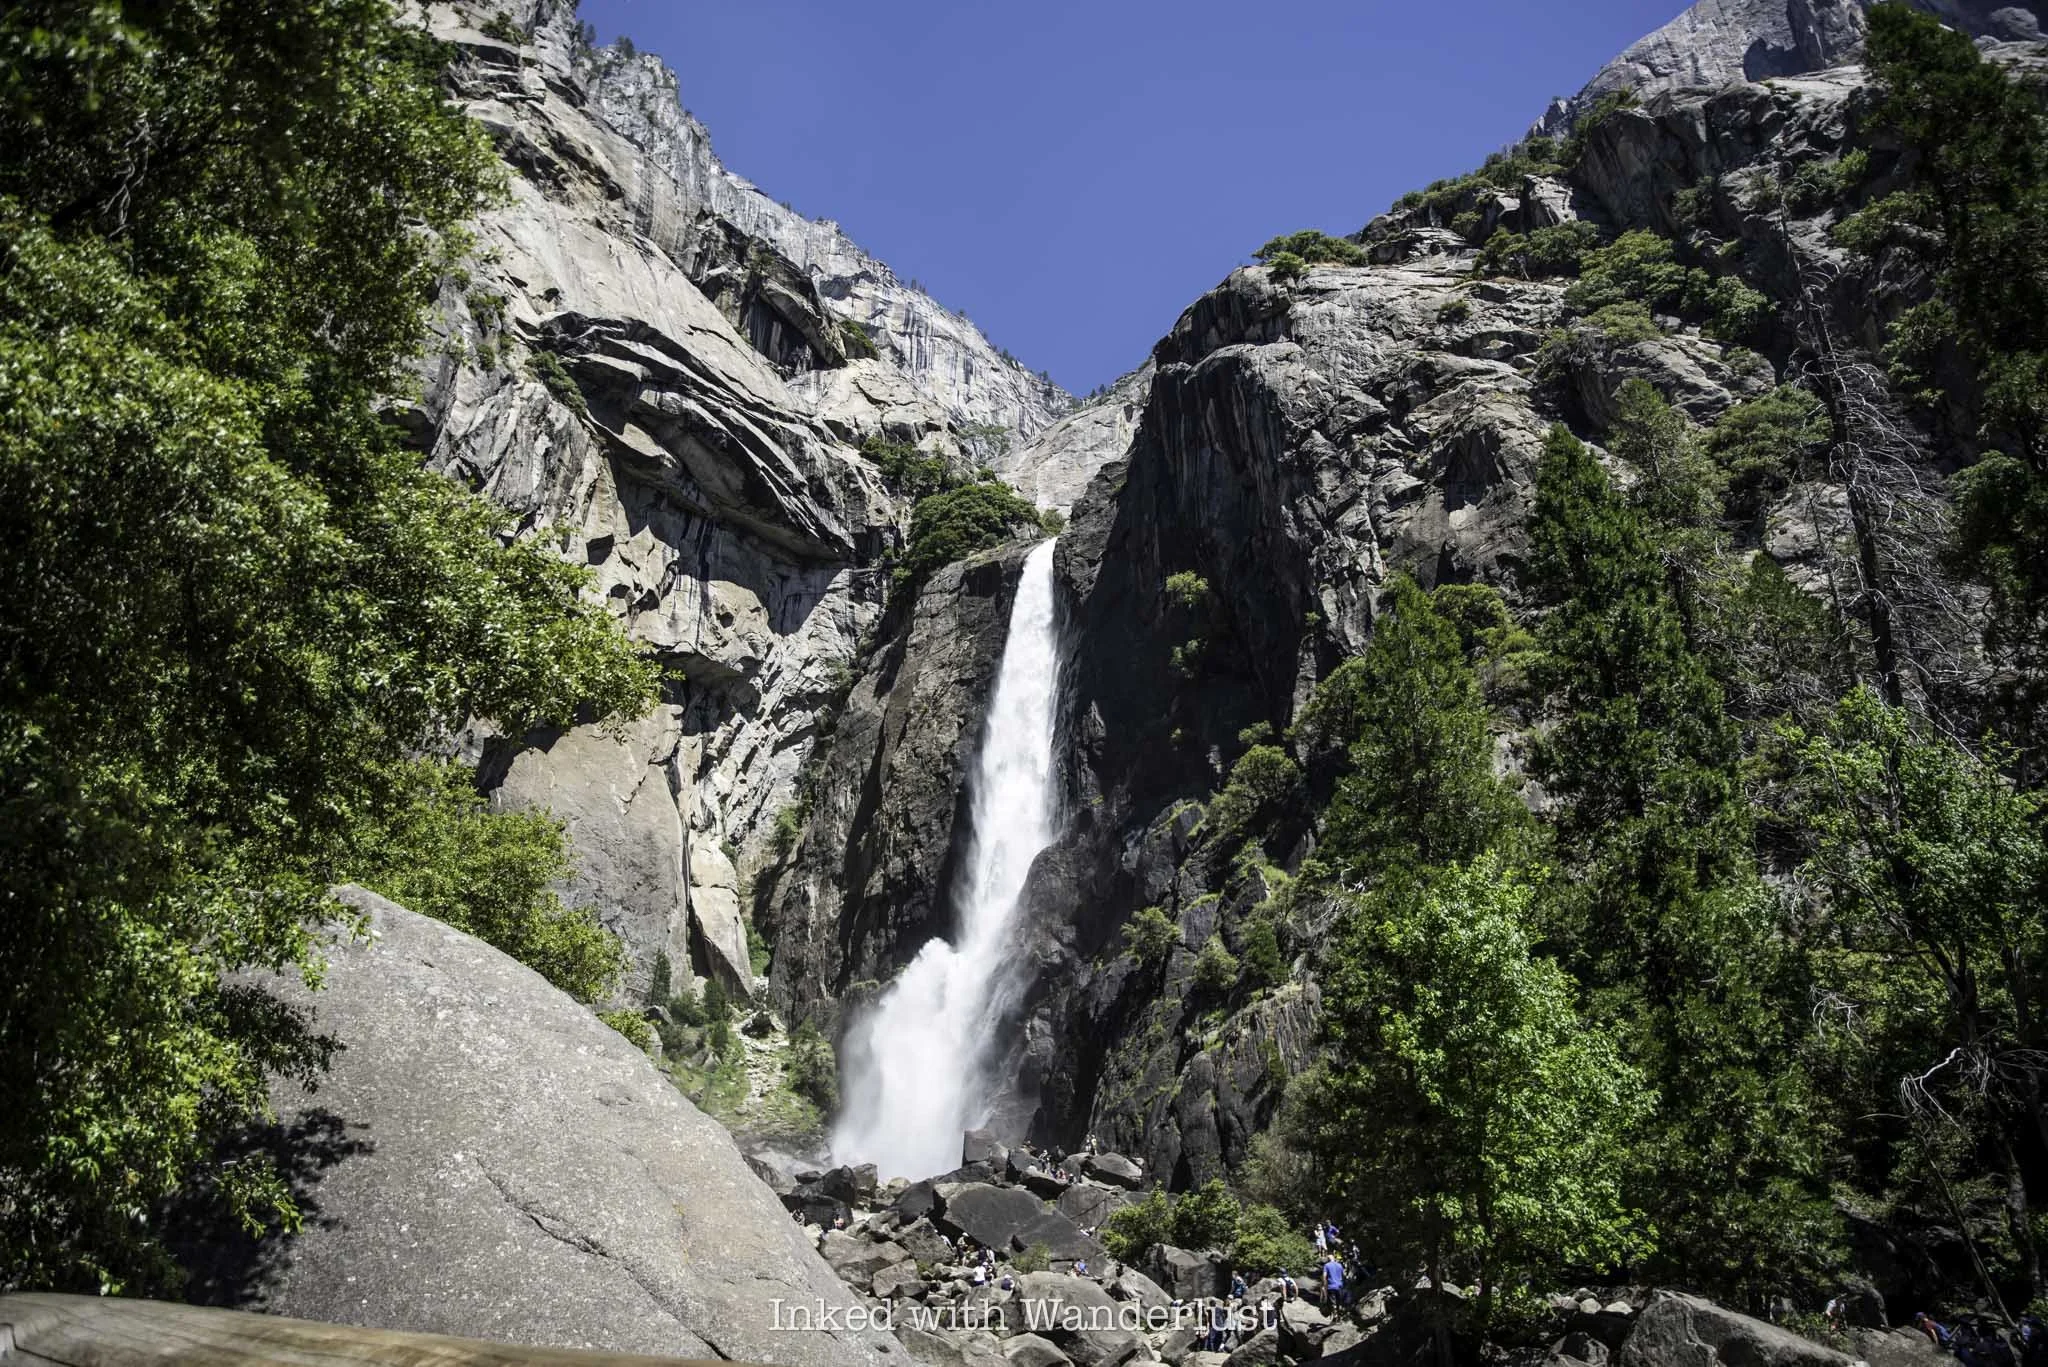
The lower section of Yosemite Falls is on full display in front of you at the trailhead so to continue, simply head straight for it and follow the path. If you’re here during the busy summer season, get here early in the morning and you’ll likely have it (mostly) to yourself.
About a quarter mile after starting, the trail will veer to the right and you’ll arrive to the base of the falls. As stated above, if you’re here in the early morning, you’ll likely only encounter a few others. After that, though, the crowds will be sizable. So pack your patience.
With few exceptions, don’t expect to see water flowing past June. Every so often there’s still flow into July, but it’s rare. If you want to see Yosemite Falls at its fullest, I recommend visiting no later than May. Once you get into July and August, the falls are all but dried up for the season.
If you feel inclined, you can boulder-hop your way to a closer view of the falls. I’m assuming Yosemite doesn’t prohibit this, as many were doing it and the ranger that was there didn’t seem to mind. Be careful, though. Those granite rocks are notoriously slick.


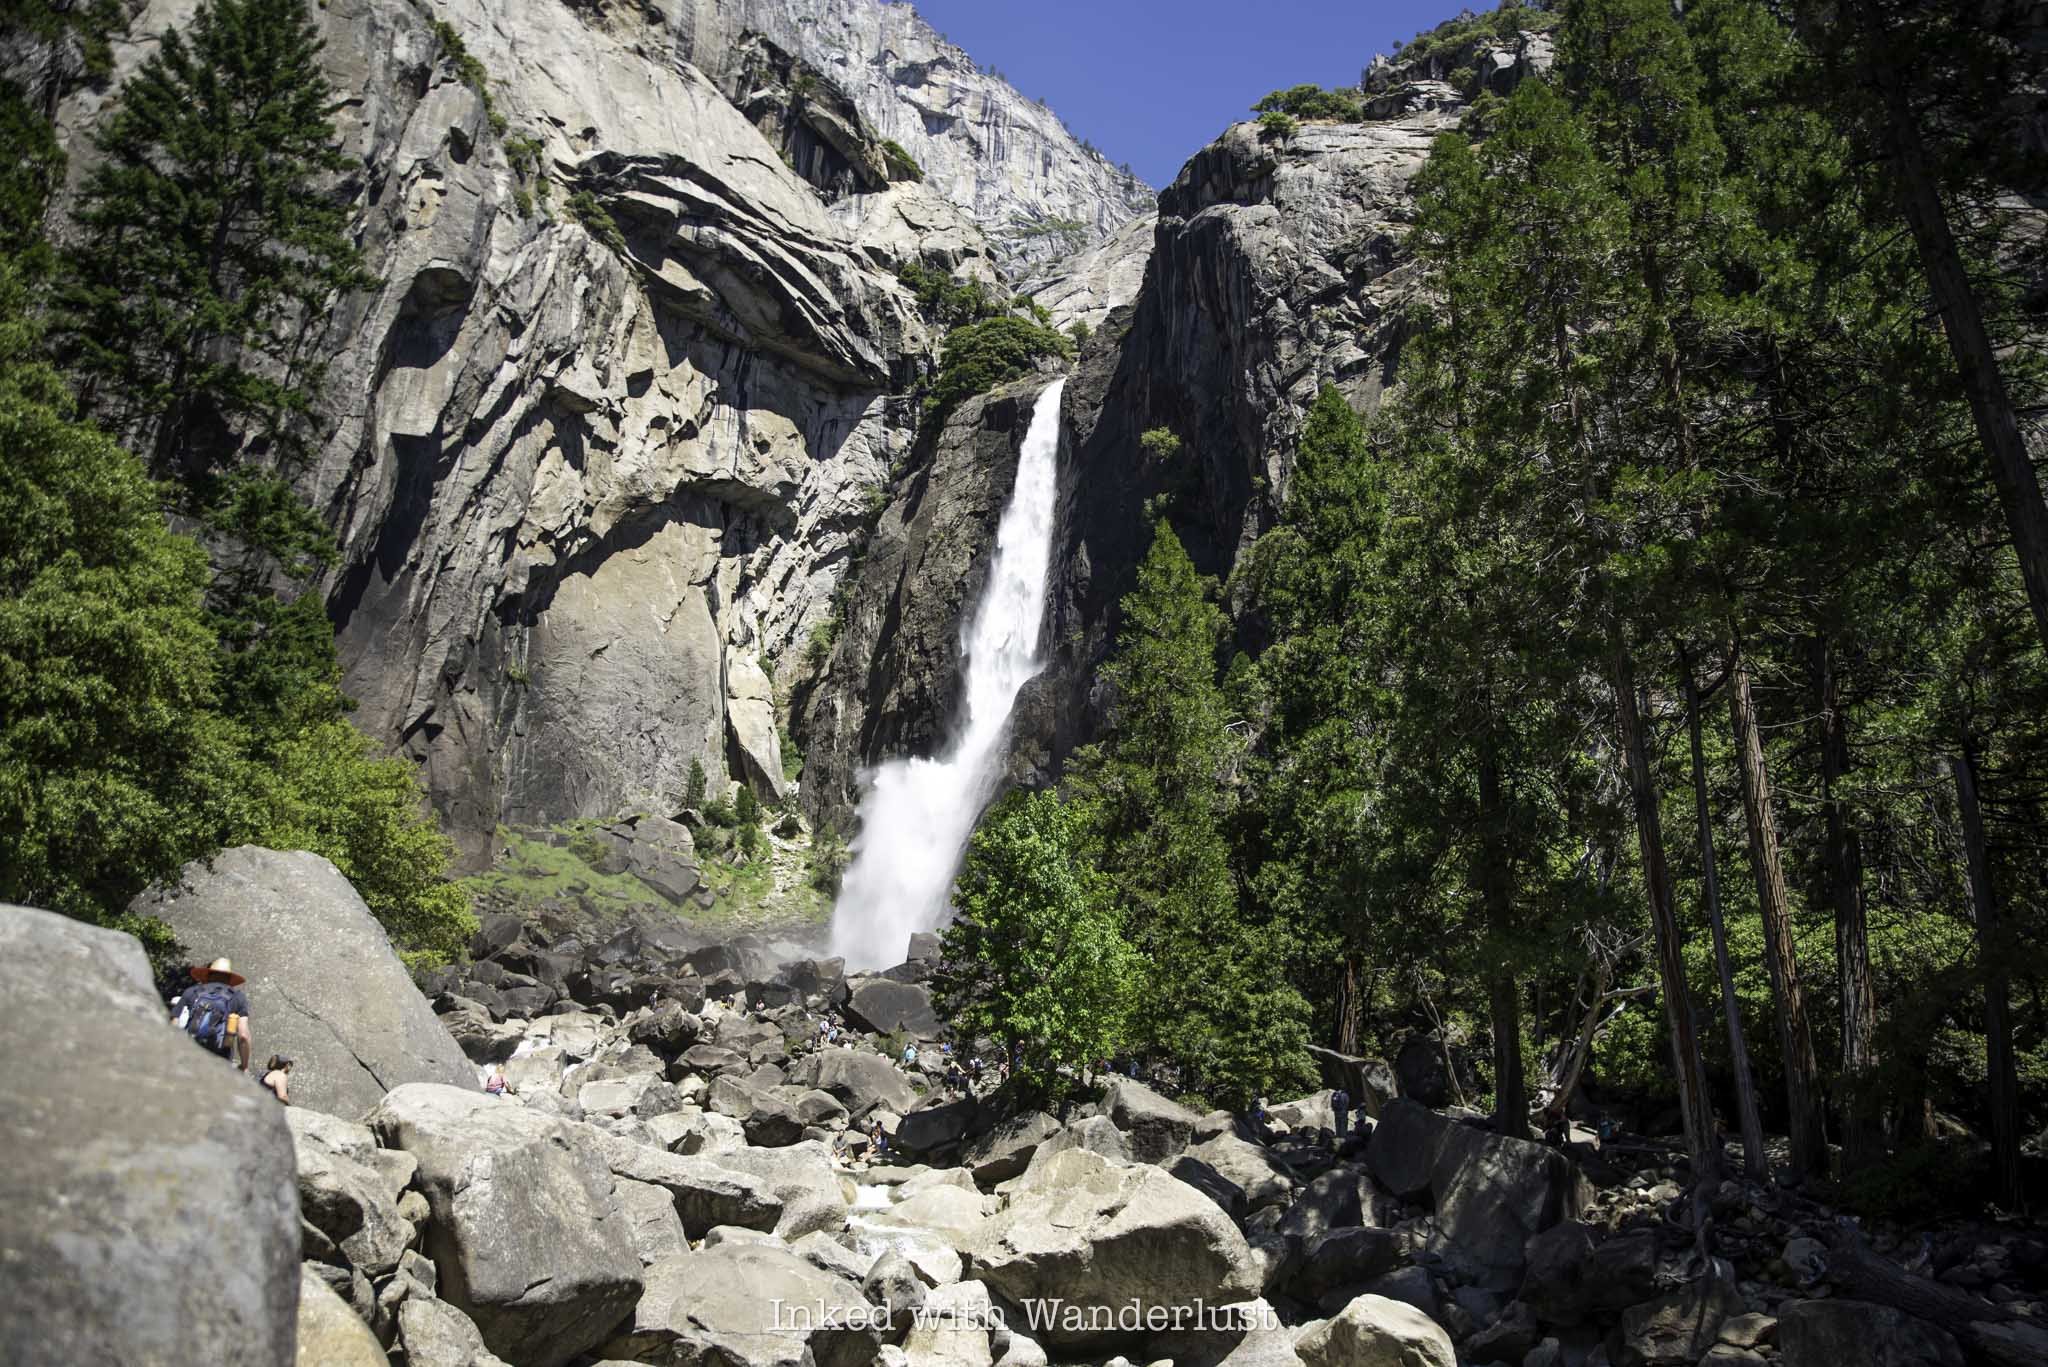
Most people stop here and head back the same way they came. For a more tranquil experience, traverse over Yosemite Creek via the wooden bridge and continue on the loop trail. Here, you’ll walk through a cluster of tall redwoods, which provide much needed shade. You’ll also get continued views of Yosemite Falls.
This segment of the trail was a virtual ghost town compared to what I experienced on the other side and at the base. Definitely don’t skip the other half of the loop. If nothing else, it’s a relatively peaceful escape from the crowds.
Shortly after crossing the bridge, you’ll come to a massive granite rock. There’s nothing inherently special about it that I was able to determine, but it’s crazy to think how loud of a noise that thing caused when it slammed into the valley floor all those years ago.

Shortly after the big rock, you’ll reach a segment of the trail that transitions from pavement to a wooden boardwalk. I asked about this and was told it’s because early in the season, there’s often runoff from Yosemite Creek and the boardwalk allows the runoff to flow while enabling visitors to still enjoy the trail.
In between the boardwalks there’s a small detour you can take for a view of the falls. Look for a small sign stating “falls view”. You’ll come to the view shortly after taking the detour. The view from here isn’t all that unique, but it’s still worth checking out since the detour only takes a few minutes.
If you’ve taken the shuttle to Lower Yosemite Falls, you’ll find shuttle stop #6 prior to the end of the loop, along Northside Drive to the left of the trail. Otherwise, continue on the loop to reach the trailhead, and continue to your vehicle.
Lower Yosemite Falls Common Questions

What is the difference between Upper and Lower Yosemite Falls?
Yosemite Falls is comprised of three parts - the lower falls, middle cascade and the upper falls. Together, they create Yosemite Falls. The upper portion is 1,430 feet tall while the lower portion stands at 320 feet. When adding in the middle cascade, the waterfall’s total height is 2,425 feet.
How long does it take to hike Lower Yosemite Falls?
That all depends on your fitness level and walking stride but generally, I would say less than one hour (including time spent at the base).
Is the Yosemite Falls hike hard?
The lower loop trail? No. It’s easy. If you’ve heard someone referring to this hike as hard, they were referring to the Upper Yosemite Falls hike which is a hard, physically demanding hike.
Do you need a reservation for Yosemite Falls?
Not for the falls itself but dependent on when you visit, you may need a day-use reservation to enter Yosemite.
Can you see Yosemite Falls without hiking?
You won’t be able to see the base but yes, there are many points throughout the park where you can see Yosemite Falls without hiking. A few include from the trailhead of this hike, Cook’s Meadow and Glacier Point.
Can you see Yosemite Falls from Tunnel View?
No, you cannot see it from Tunnel View.
When is Yosemite Falls dry?
Yosemite Falls typically begins to dry up around late June or early July. By late July, all you’ll be looking at is a smooth granite surface. If you want to see Yosemite Falls, plan you visit for between November to June. May is the falls’ peak flow time. If Yosemite Falls is dry during your visit, you can still see Bridalveil Falls, which flows all year.
PSALM 121:8


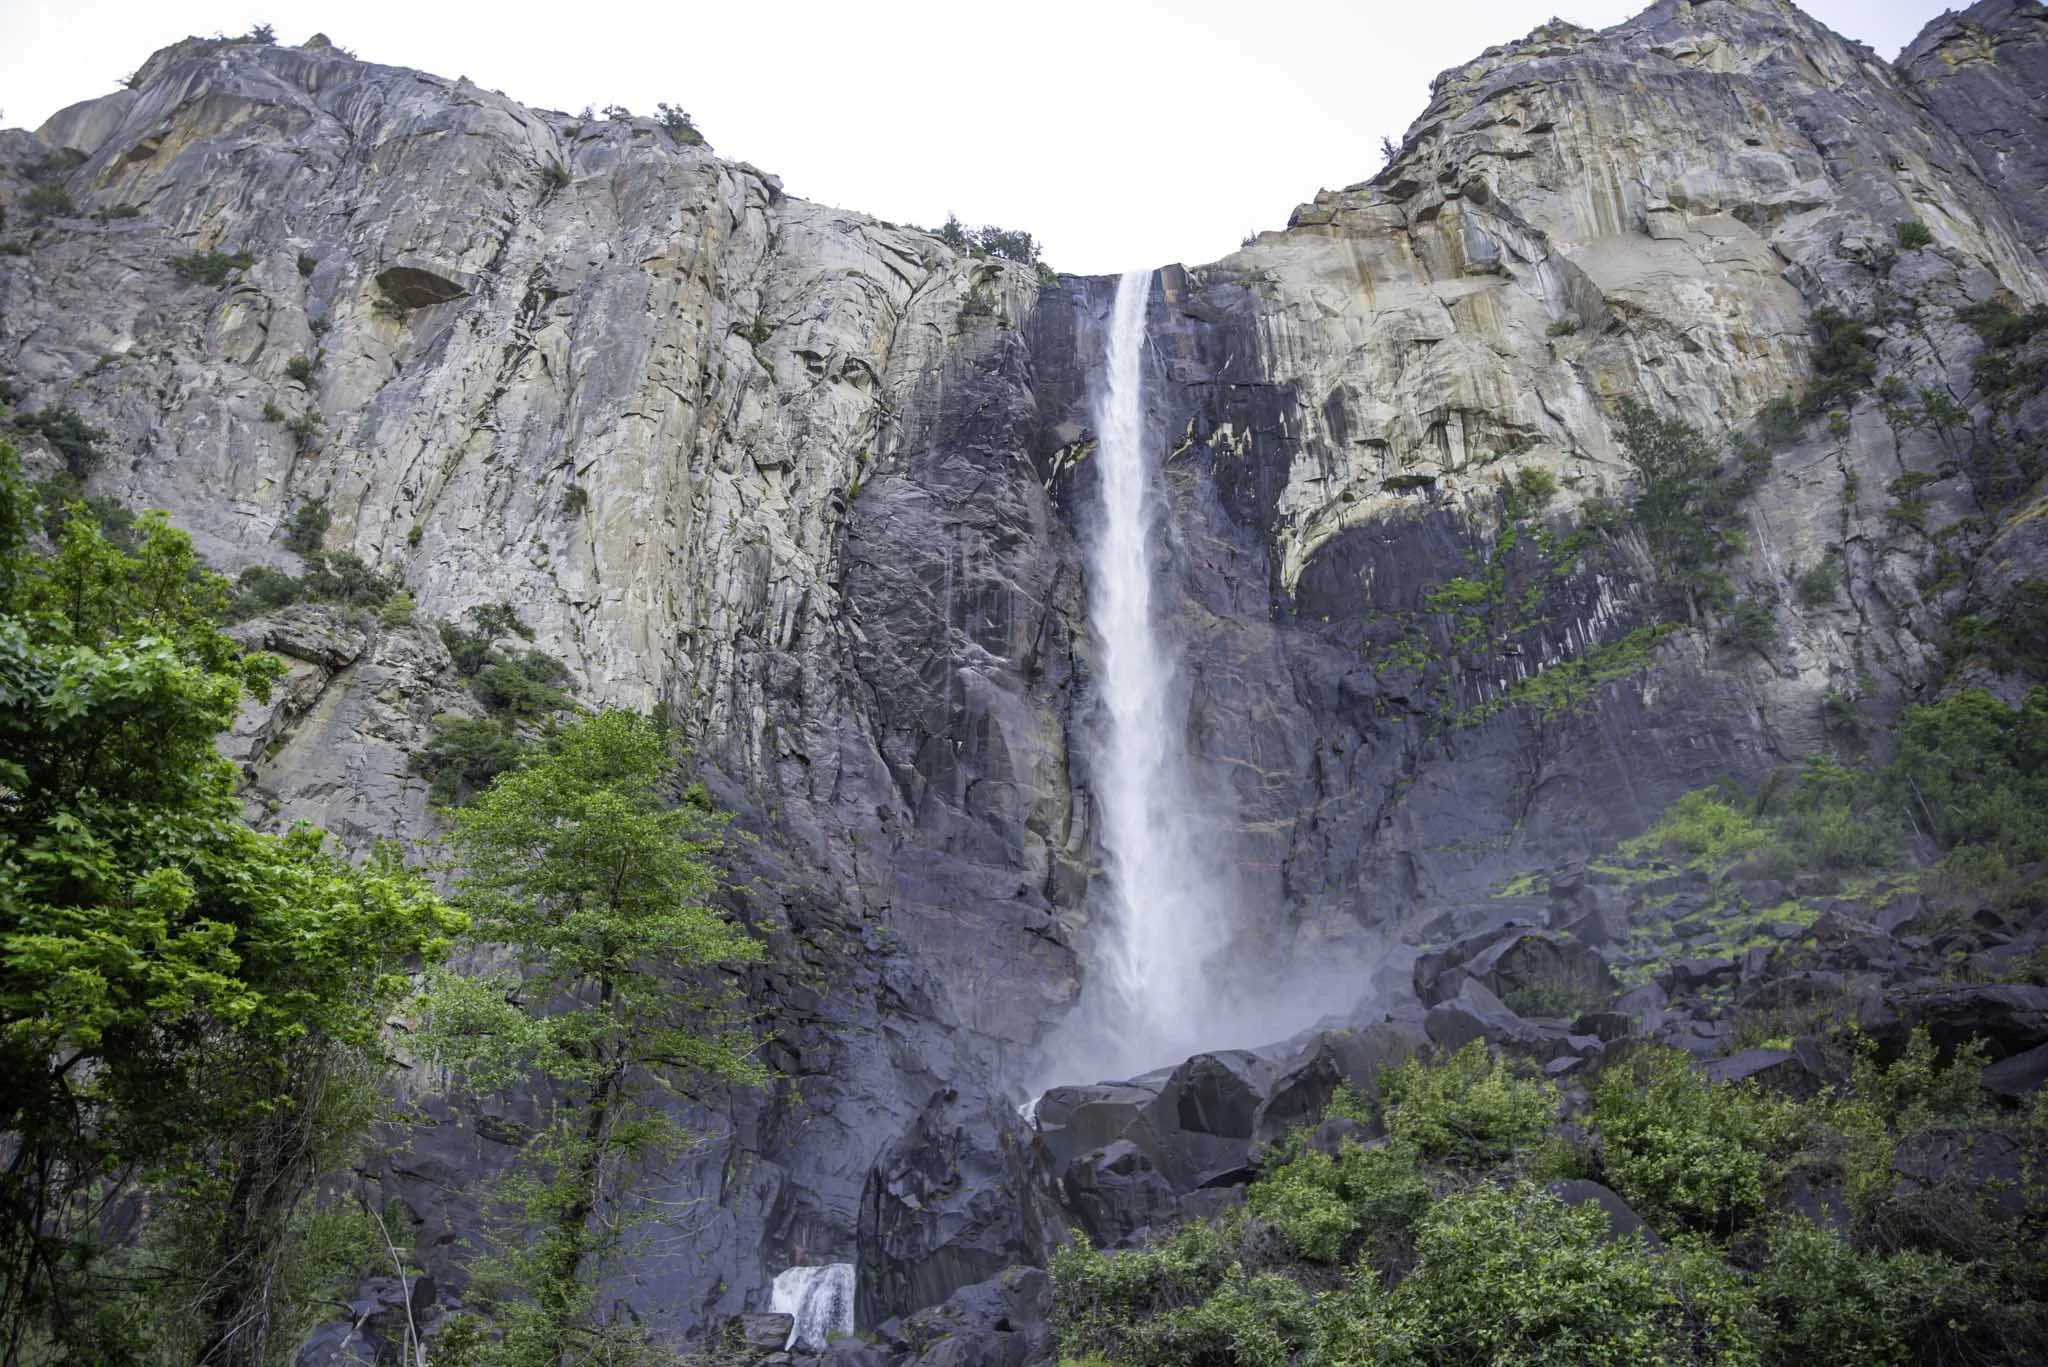
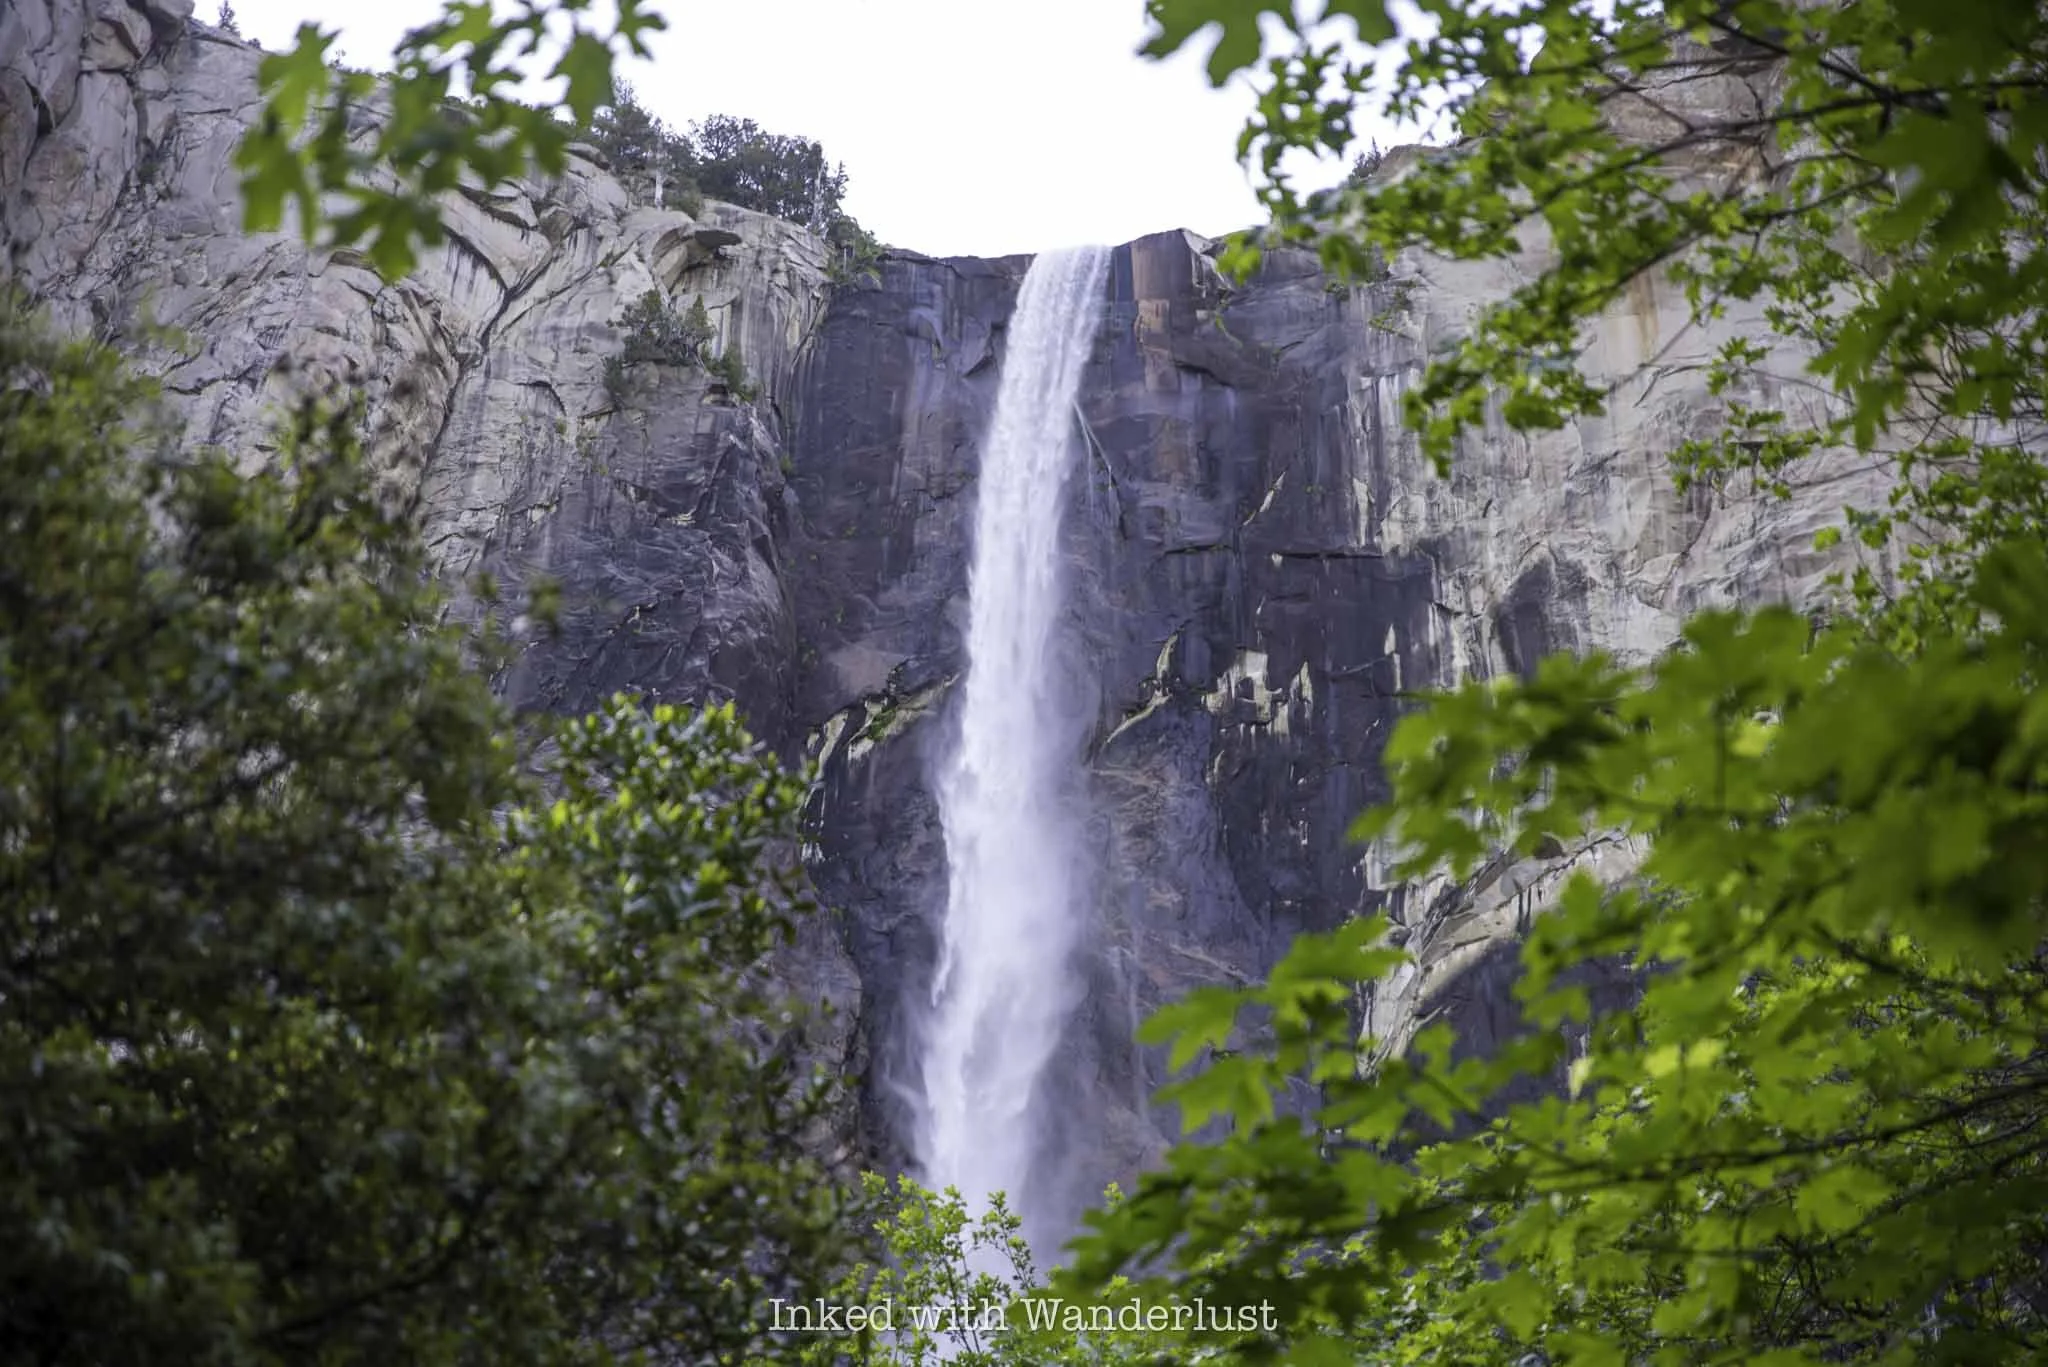
How to See Bridalveil Fall in Yosemite National Park
Standing at a commanding 617 feet, Bridalveil Falls is often the first waterfall visitors see when driving into Yosemite…

Standing at a commanding 617 feet, Bridalveil Falls is often the first waterfall visitors see when driving into Yosemite Valley. It is visible from portions of both Northside and Southside Drive, several pull outs along Big Oak Flat Road, and is part of the famed postcard view from the Tunnel View vista.
However, why stop at viewing it from afar when you can hike a short, easy-to-follow trail to the base and get up close and personal with it? Recently, Bridalveil Falls reopened to the public after a years-long closure for improvements to the trail, parking lot, and facilities.
The Bridalveil Falls hike is one of the most popular in the valley, often seeing similar crowds to other waterfall trails such as Lower Yosemite Falls and the Mist Trail. So how long is the Bridalveil Falls trail? When is the best time to visit? I discuss all of this and more in the post below.
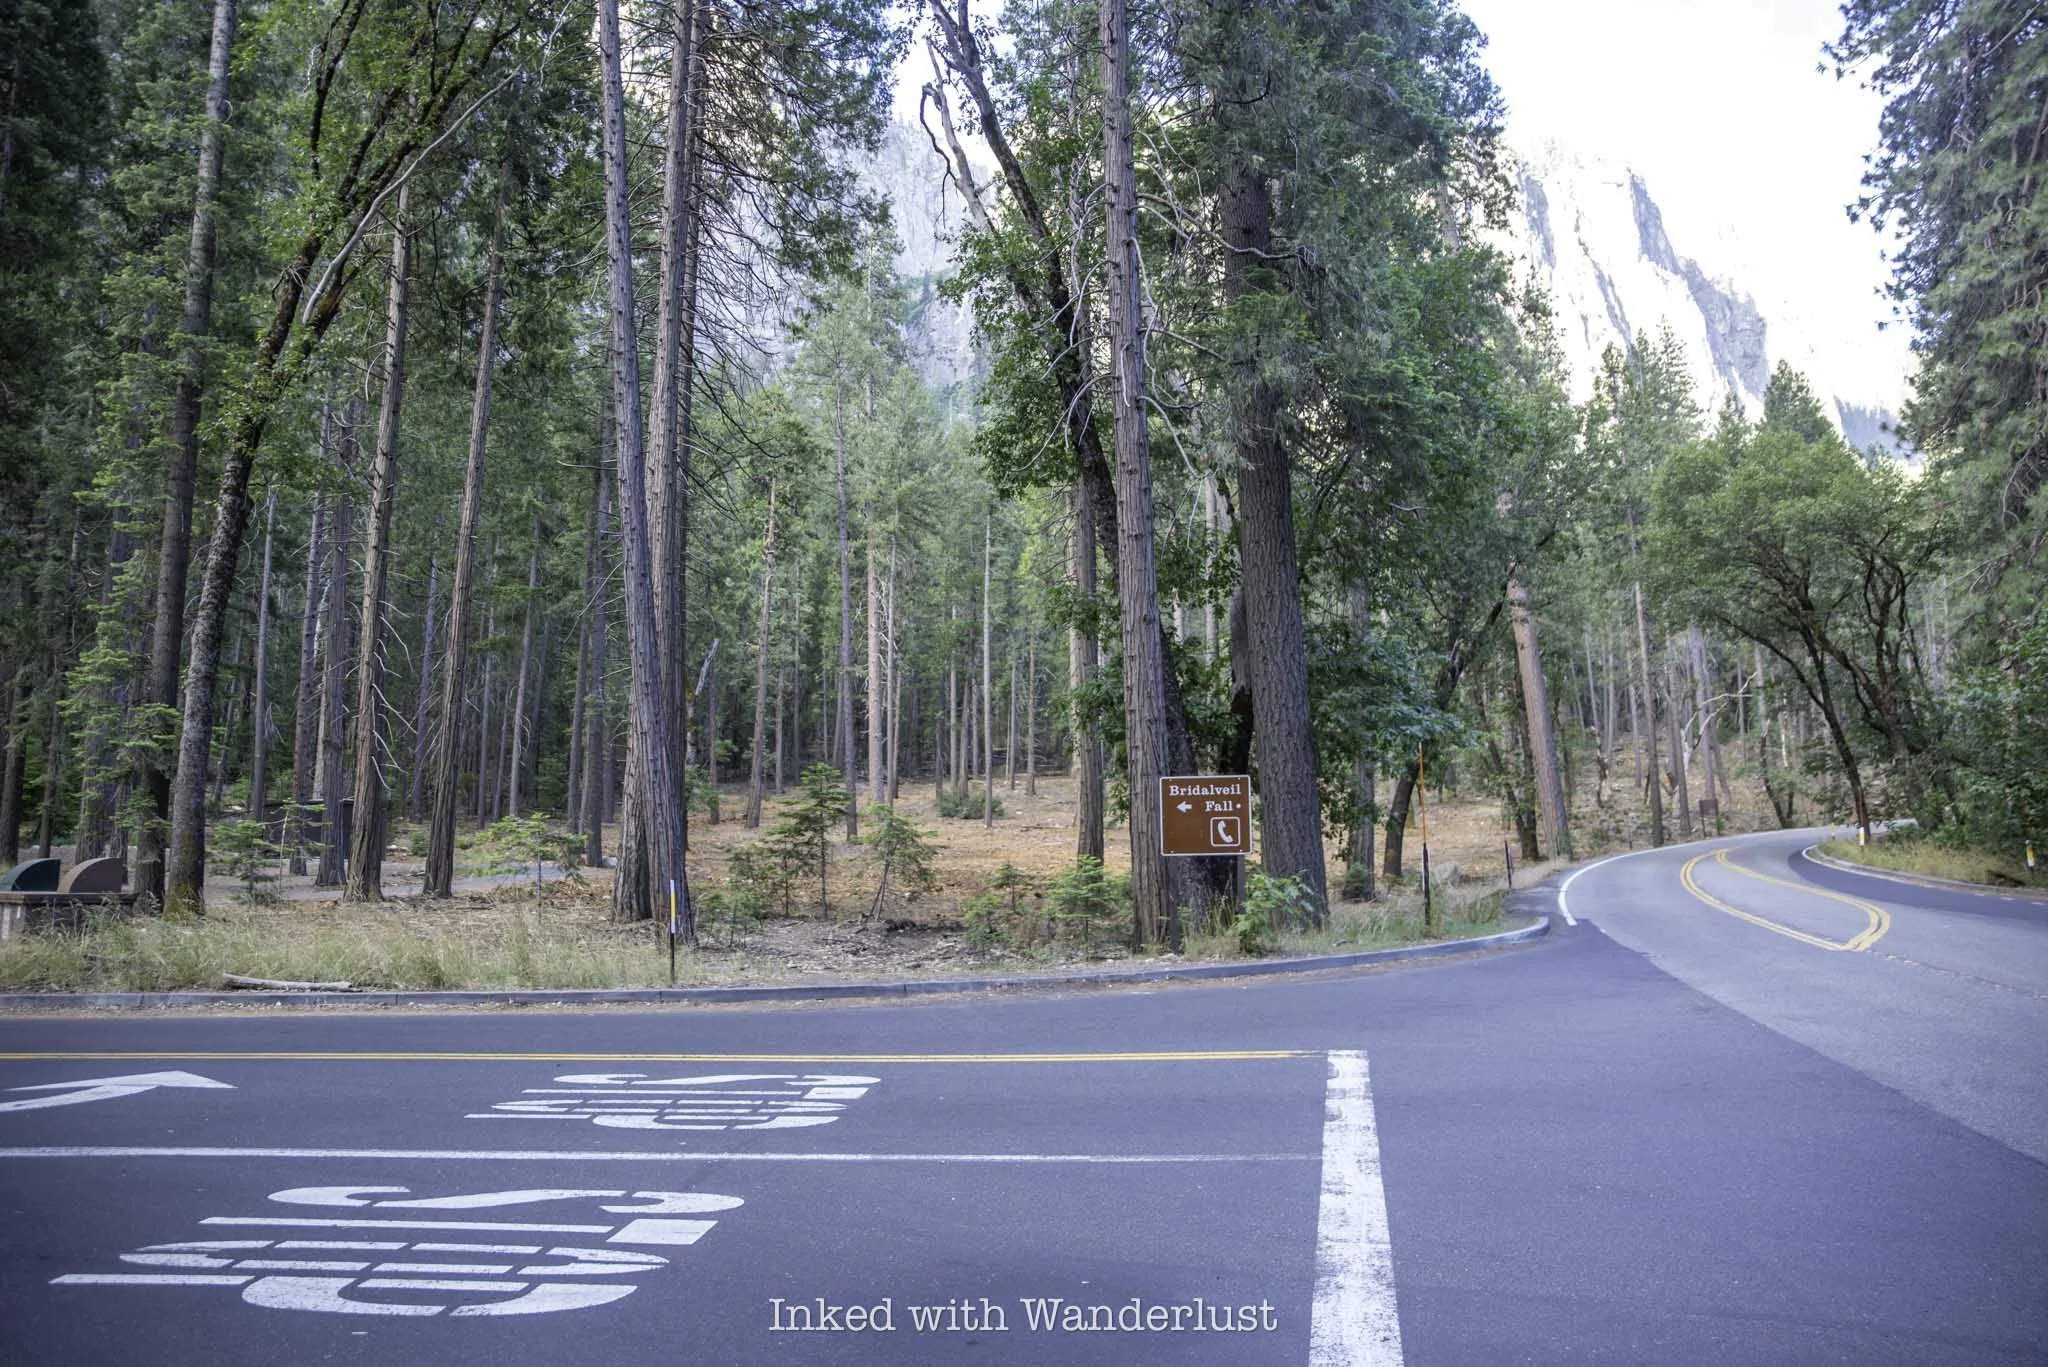
How to Get to Bridalveil Fall and Parking

As one of the premier attractions in Yosemite Valley, Bridalveil Falls is easy to reach within the park. Its parking lot and facilities have recently gone through a years-long improvement project, adding additional parking spaces, improved trail conditions, and several restoration efforts.
The parking lot for Bridalveil is on the way to famed viewpoint, Tunnel View. From the El Portal entrance, make your way through El Portal road and take the Southside Drive option at the fork. From there, turn right onto Wawona Road. Shortly after that turn, the entrance to the parking lot will be on your left.
From the west entrance, continue down Wawona Road. After driving through Wawona Tunnel and passing Tunnel View on your left, continue a bit further down the road where you’ll find the parking lot on your right.

From the park’s east entrance or Hetch Hetchy, you’ll make your way to or on Big Oak Flat Road before transitioning onto El Portal Road, then onto Southside Drive, and taking the right turn onto Wawano Road. As you can see, no matter which direction you are coming from, Bridalveil Fall is easy to reach.
One important thing to note is the Yosemite Valley or the El Capitan shuttles do not stop here. The closest is stop E5 (Cathedral Beach Picnic Area) via the El Capitan shuttle (summer months only). From there, you can reach Bridalveil Fall via the Valley Loop Trail, which is a roughly 1.5-mile hike.
Bridalveil Fall Yosemite Hiking Trail

How long is the hike to Bridalveil Fall? Not long at all. If you’re not fond of long hikes or you’re just short on time, you’ll be happy to discover that the trail to Bridalveil Fall is less than a mile, round trip, along a smooth dirt path with very little elevation gain.
The trail begins at the far end of the parking lot, just past the restrooms. To the left of the trailhead is informational literature of how Bridalveil formed, current wildlife activity, and more.
The views of the waterfall are non-stop throughout this short trail. Just past the boardwalk section of the trail you’ll get more glimpses of Bridalveil beautifully framed by trees and other greenery. If you happen to be here during the fall, the fall foliage takes the view up a few notches.
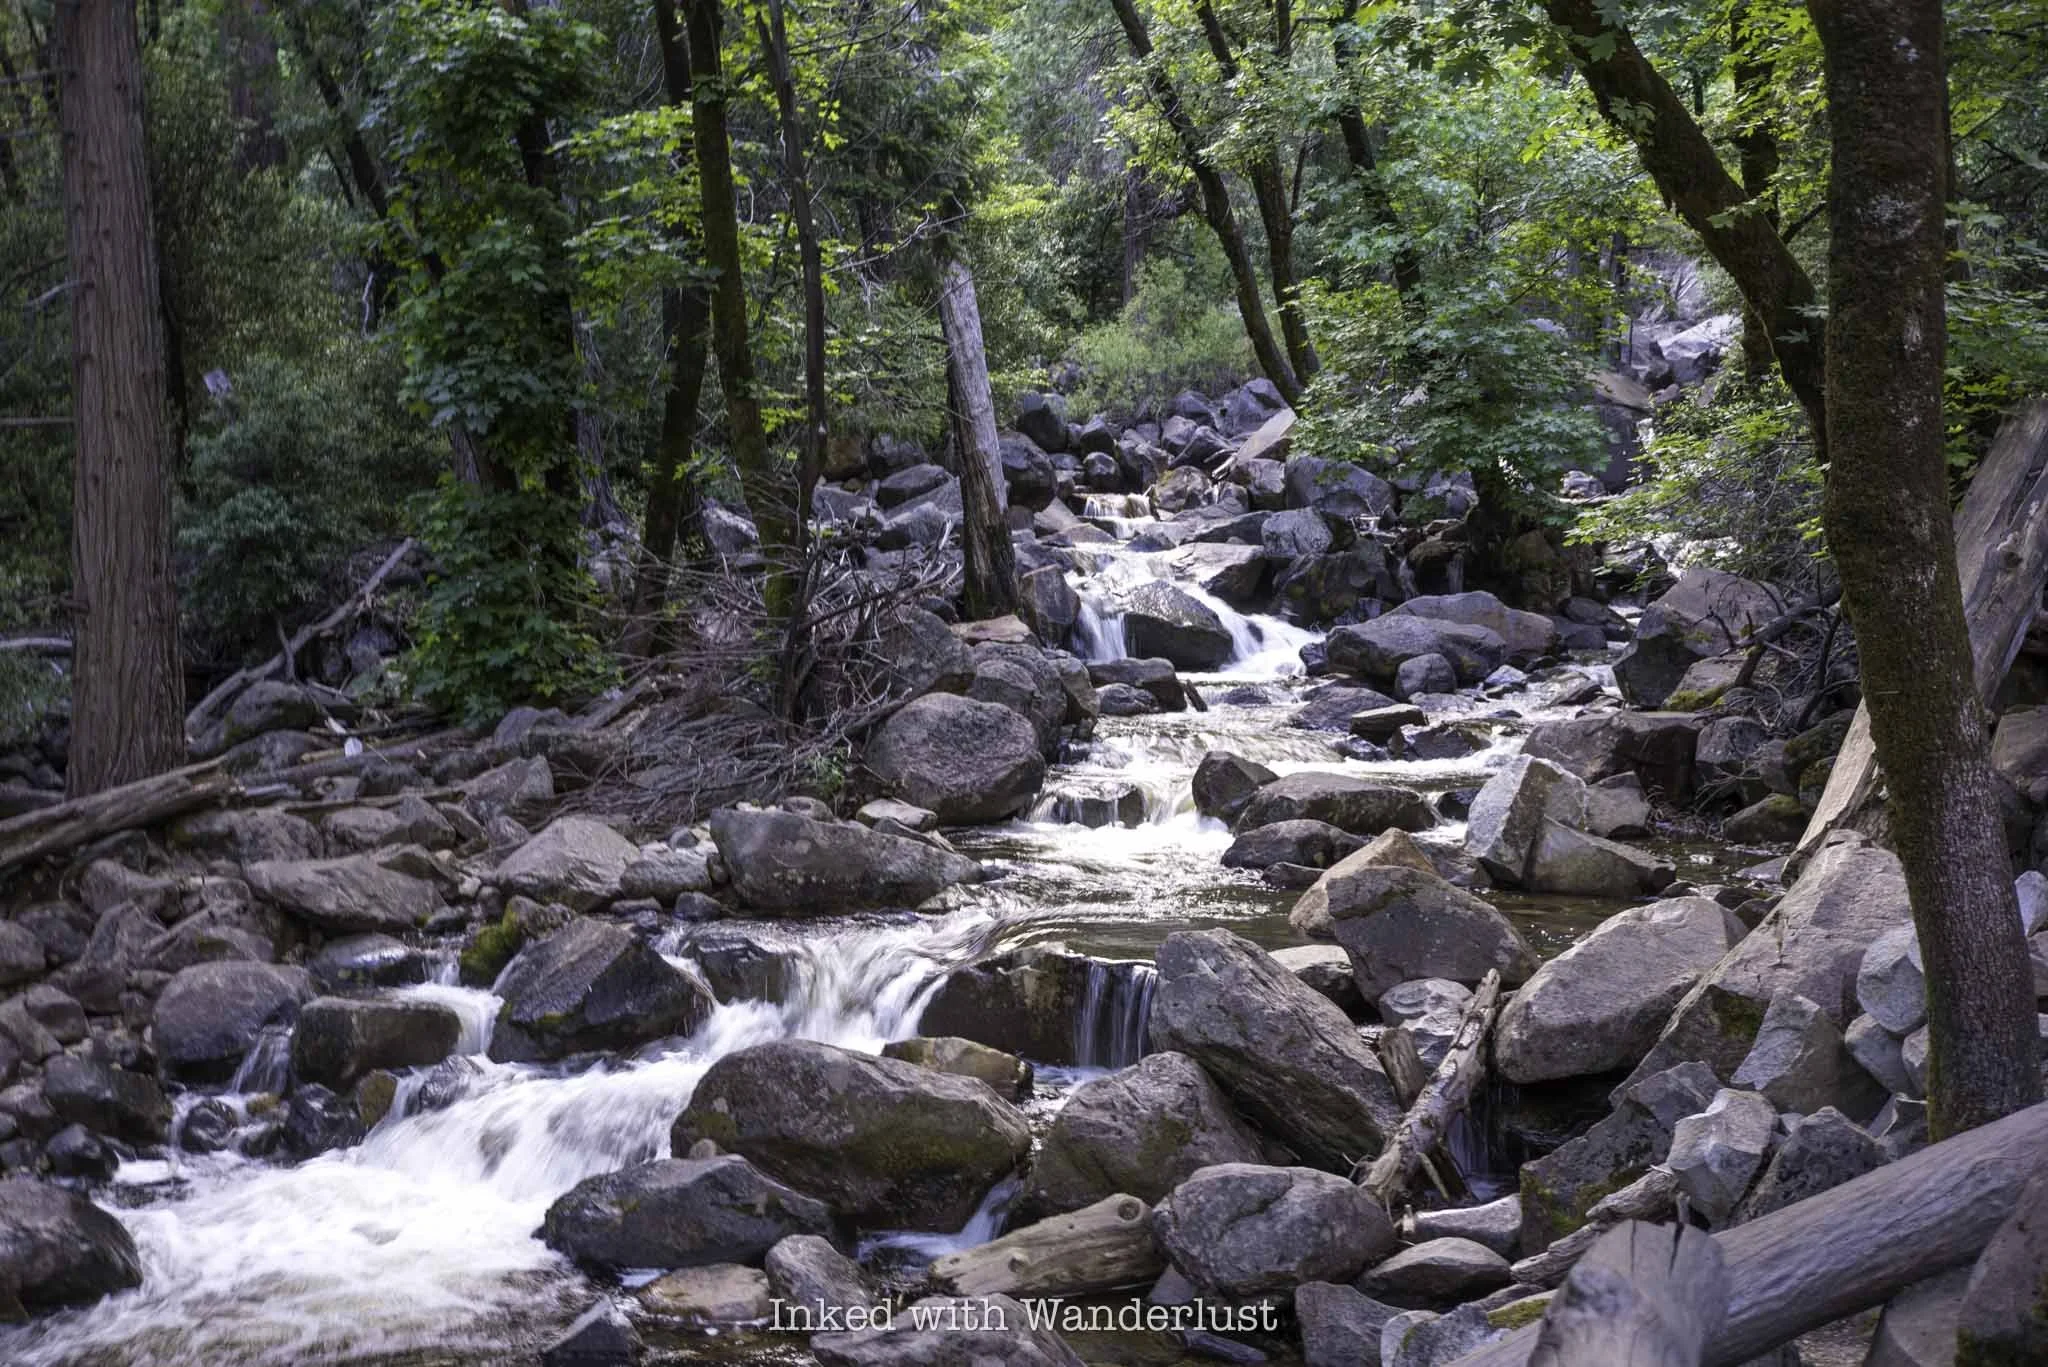
Just prior to reaching the waterfall, you’ll encounter several views of the beautiful Bridalveil Creek. While spring is the best time to see the creek at its fullest, it’s a lovely sight even when it slows down as the water cascades over the boulders, creating dozens of mini waterfalls.
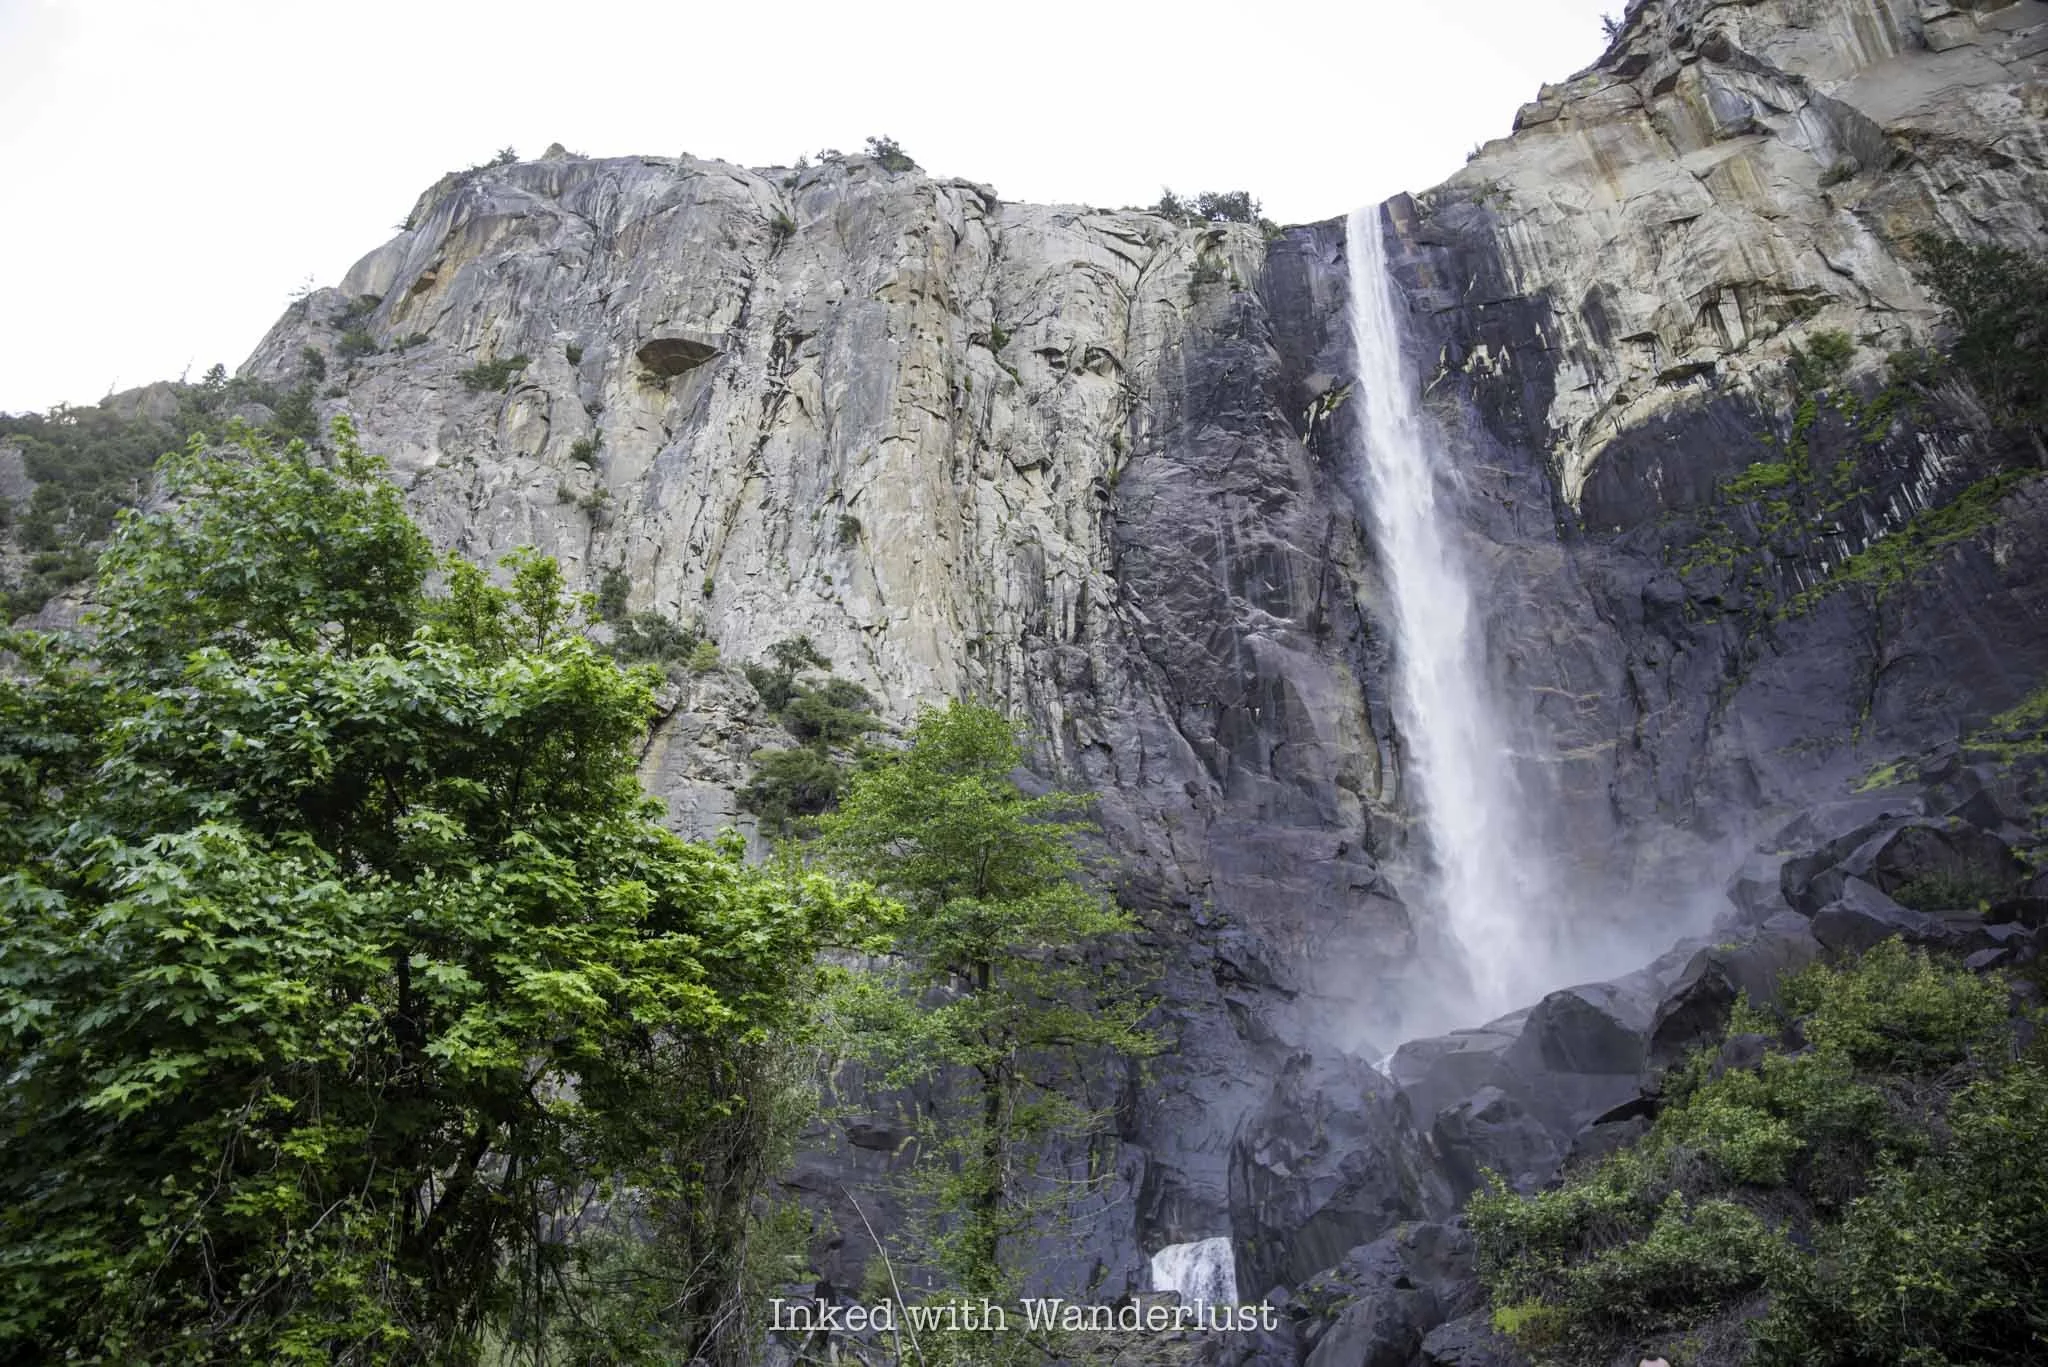
Once you reach the creek, simply follow it upstream. You’ll eventually come to a few steps and after that, Bridalveil Fall comes into view as you step into the viewing area. From here, you get close enough to the waterfall to feel the mist coming off of it (though not nearly as bad as the Mist Trail).
The viewing area is fairly small for such a popular destination. On a busy day, it isn’t unheard of for people to be shoulder-to-shoulder here. That is why I highly recommend getting here early to beat the rush. During my visit, I only had to share it with a few other people.
Common Questions About Bridalveil Fall
Is Bridalveil Fall open?
Yes. Bridalveil Fall reopened in 2023 from its years-long closure for the restoration project.
How long is the hike to Bridalveil Fall in Yosemite?
The trail is 0.8-miles, out and back.
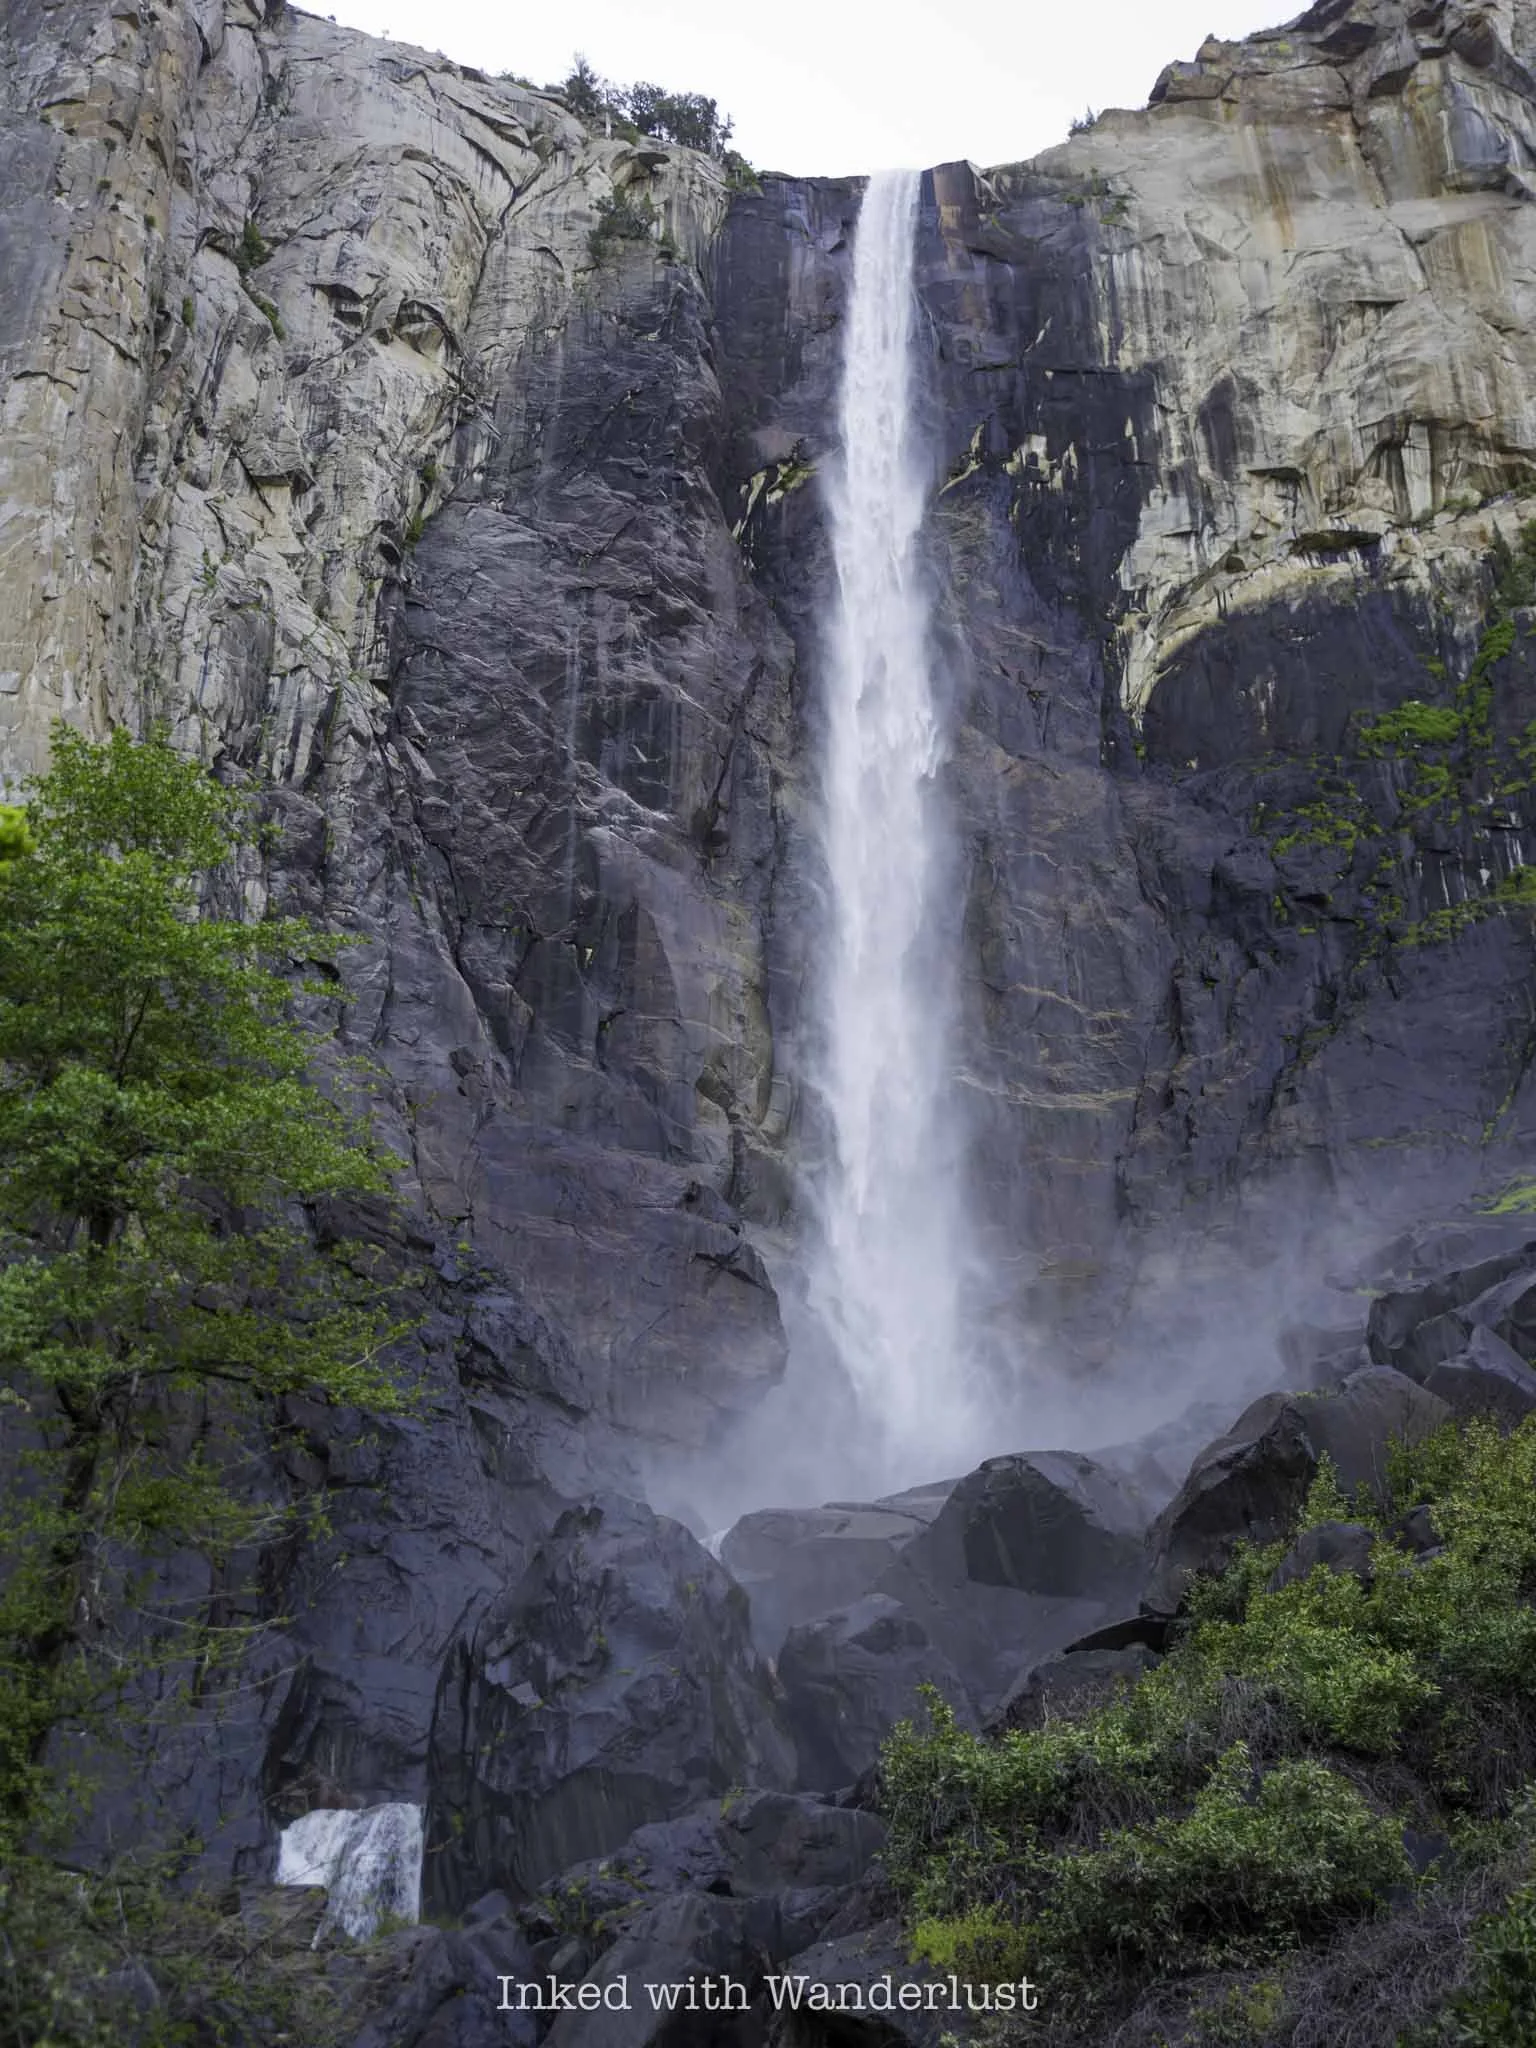
What is the difference between Bridalveil Fall and Yosemite Falls?
While both are amazing in their own right, the differences are stark. Yosemite Falls is comprised of three waterfalls (upper, middle cascade, and lower sections), totaling 2,425 feet. Making it the tallest waterfall in North America. Bridalveil Fall is much smaller at 617 feet and is a singular waterfall. Both, however, are worthy of your time.
When is the best time to visit Bridalveil Fall?
Any time. Bridalveil flows all year, so there’s never a bad time. You’ll see it at its best in the spring. The summer months bring dense crowds and a diminished(ish) flow. Fall is fantastic for the colors and reduced crowds. Winter could be a great time as crowds are minimal, but you could be dealing with icy conditions and possible trail closures.

Is Bridalveil Fall trail ADA friendly?
Yes. The entire trail is paved, with the exception of the wooden boardwalk portion. There are three steps at the end, but to the right of those steps is a ramp you can utilize. Additionally, there is very little, if any, elevation gain on this trail.
Where is Bridalveil Fall located?
There are many waterfalls with this name in the United States. Both “Bridalveil” and “Bridal Vail” are often used. The Bridalveil Fall in this article is located in the valley of Yosemite National Park, California.
When does Bridalveil Fall stop flowing?
Unlike Yosemite Falls, Bridalveil Fall in Yosemite flows all year long.
Planning a trip to Yosemite? If so, be sure to read about the current day-use reservation requirements here. Also, read about Washburn Point, one of Yosemite’s most beautiful viewpoints. Additionally, if it’s your first visit, see my recommendations for the best things to do in Yosemite Valley. Finally, no visit to Yosemite would be complete without seeing its equally amazing east side.

Hedge Creek Falls: A Short Hike To An Incredible Waterfall
While not a grand sight or a long hike deep into the wilderness, Hedge Creek Falls still packs a punch as a highly scenic…
3 minute read | Contains affiliate links
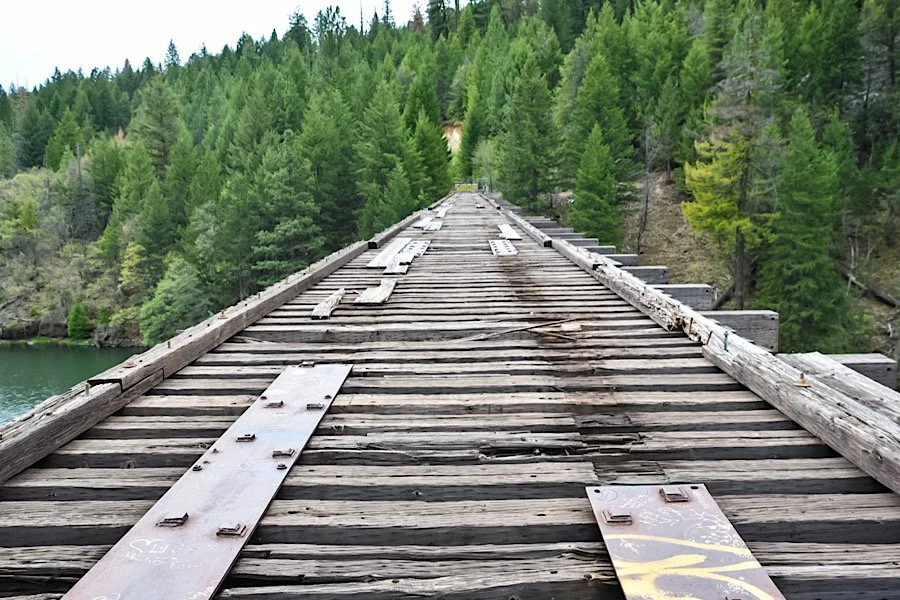
While not a grand sight or a long, deep hike into the wilderness, Hedge Creek Falls still packs a punch as a highly scenic, simple trail terminating at the 35-foot waterfall spilling over a hanging wall of basalt.
The trail’s unique feature, aside from the waterfall itself, gives hikers the rare chance of going behind the waterfall via a large cleft in the rock.
Hedge Creek Falls is perfect for families with small children, pets, or anyone who happens to be driving by and wants to stretch their legs. Both the parking lot and trailhead are conveniently located right off Interstate-5.
In this guide, we’ll cover everything you’ll need or want to know about hiking to Hedge Creek Falls. Let’s get into it.

Quick Stats
Location: Dunsmuir, CA
Fee/Permit: None
Open: All year
For: Hikers
Parking: Small dirt lot across the street from the trailhead
Restroom: Port-O-Potty in the parking lot
EV Stations: None
Drone Use: No signs stating you can’t
Difficulty: Easy
Popularity: Moderate
Time: Less than an hour
Milage: 0.7-miles, out and back
Elevation Gain: 200 feet
Trail Condition: Well maintained
Main Feature(s): 35 foot waterfall, views of Mount Shasta, and views of the Sacramento River
Pets: Allowed on leash
Special Notes/Hazards: Vehicle break-ins are common in the trail’s parking lot
Our Visit(s): May 2022
*Please practice leave no trace principles and keep to the trail

Trailhead and Parking
The Hedge Creek Falls trail is probably one of the easiest trailheads on earth to find. Both it and the parking lot are located directly off Interstate-5 on Dunsmuir Ave.
Whether you’re traveling south or north on I-5S, you will see signs for Hedge Creek as you get close. From either direction, take exit #732 and go right on Dunsmuir Ave and it’ll be right there.

If you’re coming from Burney Falls, simply travel north on CA-89 for about 56-miles before jumping on Interstate-5 south for a short time. From there, follow the same directions above.
The parking lot is of the dirt variety and small. It fills rather quickly in the summer so the sooner you can arrive, the better. To find the trailhead, simply cross the street.

The Trail
The trail begins just past the water fountain on the left. It’s a well maintained, packed dirt trail with very little tripping hazards (rocks, branches, etc).
You’ll descend down to the falls under the cover of trees, providing plenty of shade even on the sunniest of days. After just a few minutes, you’ll take note of the sounds of Hedge Creek.

After just ten minutes or so, you’ll arrive at the waterfall. The time of year you’re visiting will determine how heavy the flow is. We were here in May and it wasn’t flowing very heavily.
As you approach the falls, the trail temporarily gets rockier (and slick during the winter) due to how close you’re able to get to both the falls and the creek.


Here, you’ll have the rare opportunity to walk directly behind a waterfall. There’s a large cleft cut into the columnar basalt wall for you to walk through.
You’ll also take notice of the dozens of handprints all over the walls of the hanging rock. These were left by visitors who used the mud in the cleft to leave those prints.


From here, the trail continues for another tenth of a mile to a spectacular view of the Sacramento River and an ‘ok’ view of the summit of Mount Shasta (the rest is obstructed by trees).

Onward to Mossbrea Falls
Now, there’s (almost) nowhere left to go. Most will simply turn around and go back their car. Others could cross the river (if it’s safe) and continue on to an even more beautiful waterfall, “Mossbrea Falls”.
Currently, there’s only an unofficial trail to Mossbrea that requires hikers to commit the crime of trespassing on more than one occasion. So the only other way is to cross the river.
The Mount Shasta Trail Association has been making efforts to finally construct an official trail. Essentially, the plan is to connect Mossbrea Falls to the Hedge Creek Falls trail via a bridge over the river.

Unfortunately, there hasn’t been much progress as the last update given by the MSTA was back in July of 2020. If you want to keep tabs on this project, go here.
Hopefully this project will pick up steam soon because Mossbrea Falls is amazing and it’s criminal that it can’t be accessed without risking a misdemeanor charge.
Have you been to Hedge Creek Falls? Or are you a local and have heard any rumors about the trail to Mossbrea or what the hold up’s about? Lets us know about it in the comments below!


Please support our website by sharing this article with your family and friends.
Thanks for reading.
McCloud River Falls: Three Fantastic Waterfalls in One Hike
Just a short distance between two popular Northern California towns; Burney and Dunsmuir, McCloud Falls is a series of three…
Disclosure: This post contains affiliate links. If you make a purchase through these links, I may earn a small commission at no additional cost to you. I only recommend products or services that I believe will add value to my readers.

Just a short distance between two popular Northern California towns; Burney and Dunsmuir, McCloud Falls is a series of three beautiful waterfalls along the McCloud River.
Lower, Middle, and Upper McCloud Falls are easily accessible by foot via a 3.9-mile (out-and-back) hiking trail or by driving to each one via the paved road connecting the three. Additionally, each fall has its own parking lot with picnic tables, signage, restrooms and a campground nearby.
In this guide, we’ll cover a few things you’ll need to know about each of the falls like where to find them, how to access them once you’re there, etc. Let’s get into it.
Quick Stats
Location: McCloud, CA (in between Burney and Dunsmuir)
Fee/Permit: None
Open: Year round, but can be difficult to access in winter
Parking: Large, paved lots at each waterfall
Restroom: Three (one at each waterfall)
EV Stations: None
Drone Use: Allowed (UAV must be registered and follow applicable laws)
Difficulty: Easy by vehicle / Easy to moderate by foot
Popularity: Popular
When: Weekdays and early is best for lower crowds
Time: 2-3 hours
Milage: 3.9 miles, out and back via the trail
Elevation Gain: 337-feet
Trail Condition: Well maintained and easy to follow
Main Feature(s): Three waterfalls of varying heights
Campground: Fowler’s Campground (located near the lower falls)
Pets: Allowed on leash
Special Notes/Hazards: Each waterfall can either be hiked or driven to. No specific dangers aside from usual wilderness hazards.
Our Visit(s): August 2019 & May 2022
Directions To McCloud Falls

If you already happen to be at Burney Falls (or will be), making McCloud Falls part of your itinerary is easy as it’s just under fifty miles away. Even better, if you’re coming from Interstate-5, it’s only thirty(ish) miles away.
McCloud Falls is a well known destination, so simply plugging that into your GPS of choice will get you there without issue. If you’re not a tech person, here’s the simple directions:
From Burney: Go north on Highway 89 for 35-40 miles, then take a left onto Fowler Public Camp road and follow the directions.
From Dunsmuir: Go north on Interstate-5 and take the exit for Highway 89 south. Follow this for about 20-25 miles and take a right onto Fowler Public Camp road.
The road leading to the falls is paved and well maintained. You just need to decide whether you’re going to hike to all three or simply drive.
The falls are handicap accessible and feature viewing decks straight off of the parking lots. For those who wish to, you have the option to walk down to the base of each one for a closer look.
Because we stopped here between our visits to Dunsmuir and Burney, we decided to drive to each waterfall and walk down to their bases to save time. While I recommend hiking the trail connecting the three, you can save a significant amount of time by doing what we did.
Lower McCloud Falls

The lower falls is a great place to begin your visit. The parking lot is paved and decently large. The viewing deck is just off the parking lot, past the restrooms.
If you’re able, I highly recommend going down the stone steps to get a closer view of this 15-foot waterfall. These stone steps is also where the official beginning (or end) of the hiking trail is. I have seen pictures of people swimming in the emerald green plunge pool, so I assume it’s allowed.
In fact, while you’re there, look for metal hooks embedded into the rock. According to a local I spoke with, those are the remains of what used to be a ladder swimmers used to climb out.
From here, you can either start hiking up the trail to the middle falls or head back to your car and drive up. If you drive, simply take a right up the road and look out of the waterfall sign.
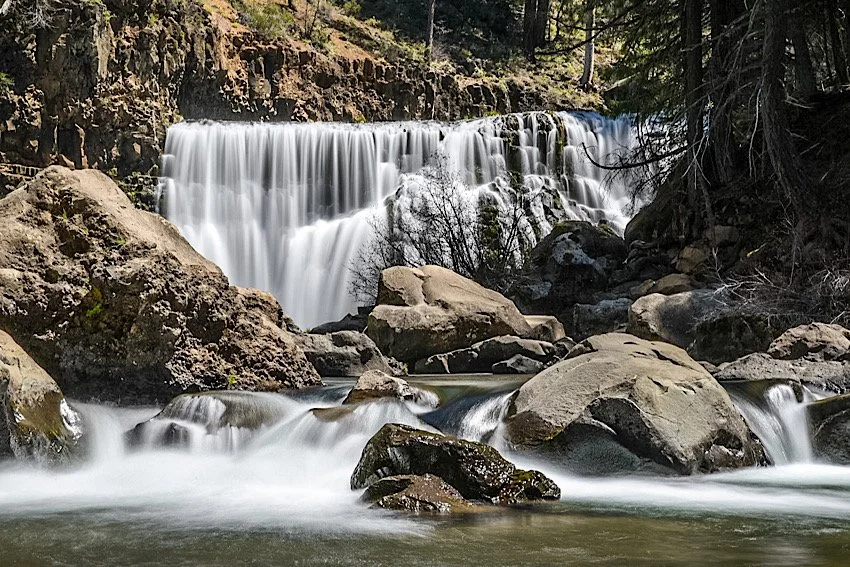
Middle McCloud Falls

The middle falls was our favorite and arguably the most impressive of the three. If you only have time for one, I recommend this one. If you’re hiking here from the lower falls, the trail will take you straight to the base. If you drive, you’ll need to hike down or simply view it from above.
To get to the base, you’ll need to hike the short, quarter-mile(ish) trail to the bottom. It’s easy to miss and there isn’t any signage indicating where to go (at least none that we saw). What you’ll look out for is a dirt path, lined with rocks, spurring off to the right from the paved one going to the viewing deck.
The trail consists of packed dirt and while a bit rocky in some spots, overall it’s a well-maintained, easy to-follow trail. You’ll take a short series of graded switchbacks before reaching the bottom.

When the trail flattens out at the bottom, keep left to the falls and you’ll eventually reach a rest area. Between you and the falls is a boulder field that you’ll need to scramble over if you want a closer view. The pool in front of the falls is perfect for swimming and while we don’t how deep it is, we have seen videos of people cliff jumping into it, indicating it’s decently deep.
Out of the three, the middle fall is where we spent the majority of our time. I wrote an extensive post highlighting the middle falls and its trail if you’d like to read more about it.
Upper McCloud Falls

The upper falls is the one with second tallest plunge at 30-feet. Similar to the lower fall, it’s narrow and dumps into a small pool but unlike the lower fall, it’s carved out an opening between the basalt rock walls, rather than just spilling over it.
There’s a plethora of viewing space up top but unfortunately, none of them provided an impressive view of the waterfall (in my opinion, anyway). To get a better view, you’ll need to rough it a bit.
Just past the last viewing deck, where the dirt trail begins, you’ll see a spur trail on your left going straight down to the waterline. Watch your footing and take your time. It’s short, but steep with nothing but loose dirt and rocks. Taking a spill here wouldn’t feel good.
There isn’t a lot of space at the water’s edge. Most of it consists of awkwardly spaced boulders that you’ll need to sit or stand on to view the waterfall.
When you’re done, head back up and go a little further upstream to see the cascades feeding the waterfall or read about the development of these falls on the informational signs near the trailhead.
Hike or Drive?

That all depends on personal preference, physical limitations, how much time you have, etc. Both have their advantages and disadvantages.
Hiking the trail: You’ll need to ensure you have the proper equipment with you such as trekking poles (see my recommendation here), hiking boots/shoes, water, sun protection, etc. Each waterfall is less than one mile from the next and the only real “challenging” part is the uphill slog out of the middle fall. Aside from that, it’s a fairly simple trail.
Driving to each fall: For those short on time or with physical limitations, this would be the best option. Each fall has its own parking lot and all of the upper viewing decks are wheelchair accessible. If you’re able, you can still get a close view of each waterfall (which is really the main point, anyway).
As far as where to start, that’s also your personal preference. If you’re hiking with a group with multiple vehicles, our recommendation would be to leave a vehicle at the lower fall, take another up to the upper fall, and start the hike there.
This strategy is two-fold as:
You’re hiking down to the lower falls, bypassing having to work your way up and out of the middle falls.
Saves you time by cutting the hike in half.
If you’re driving, it doesn’t really matter where you start. If you only have time for one waterfall, we recommend the middle falls as it’s the largest, most scenic/photogenic, and has the best swimming hole.